I finished this necklace yesterday for my Grandmother. It's a belated mother's day present. originally, I tried making her a pin, because she is the kind of person who wears pins, but I had nothing but trouble with it. Finally, I gave-up. Which is rare for me. Normally, I stick it out. Oh well.
But I came up with this instead:
The acrylic shrine tag is from Retro Cafe Art Gallery. The man in the photo is my grandfather, who passed away a few years ago. (I don't know why there are those weird spots on the charm in this picture, because in real life there aren't any.) The heart charm is shrink plastic that I embossed with pearl-ex and them stamped onto when cool.
Friday, May 23, 2008
Sunday, May 18, 2008
Art Journal Page
I know I haven't published many photos from my journal lately. That's partly because I've had so much design team and other work (like my mom's mother's day gift) that I haven't been working in it much. But it's also because I what work I have done over the last month is being published in Page By Page, so I couldn't put it up here.
But I did do this page today and thought I'd put it up. It's acrylic and Copic marker.
Saturday, May 17, 2008
Elsie in New York
I got a couple of these really cute lady buttons from Coffee Break Designs--via Retro Cafe Art Gallery but could not for the life of me figure out what to do with them. And then was flipping through an old book and found a story titled "Elsie in New York" and I had an idea. So I made this card for my friend Sarah, who is leaving for New York in a few weeks.
Then, still feeling inspired, I pulled out my sewing machine and made this:
I am totally digging these buttons!
Then, still feeling inspired, I pulled out my sewing machine and made this:
I am totally digging these buttons!
Labels:
Artist Trading Cards,
buttons,
Card Making,
design team work
Thursday, May 15, 2008
Sew Charming
Sometimes life just comes together in the right way. IAA is having a charm swap this weekend and I spent some time the last 2 weeks coming up with a fabric design for a charm. (I'll post pics of them tomorrow, hopefully.) And then I read on PaperArtsy's site about this contest they're having and everything just fell into place. Why not make charms? So I made this bracelet.
Some of the charms are shrink-plastic and the rest are made out of a fabric called duck-cloth. I cut it in strips and then stitched it together--stuffing it slightly and then attached the charm via a eyelet. I have to say, that my crop-a-dile was perfect for punching the holes in the fabric. When they were done I used a little fray-check on the sides.
All the stamps are, of course, paperartsy.
Tuesday, May 13, 2008
Clear Book
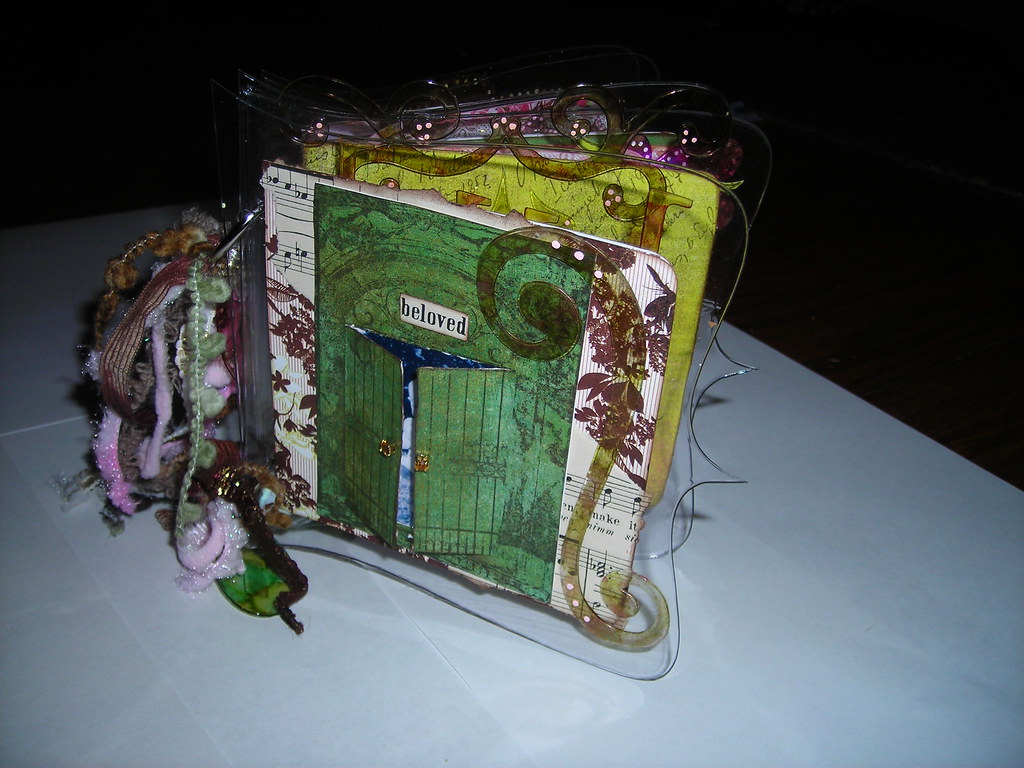
For mother's day I made this little clear acrylic book using a kit by Fancy Pants. It's really great--it comes with the pages and a bunch of acrylic die cuts. I didn't even use half the stuff that came in the box it was so full!
Here are 2 shots of the cover, one closed and one being held open. The baby in the image is my mother. The stamp is by Paperbag Studios.
Here is a shot of the book propped-up. I used alcohol inks on most of the die-cuts, and then accented them using a souffle pen.
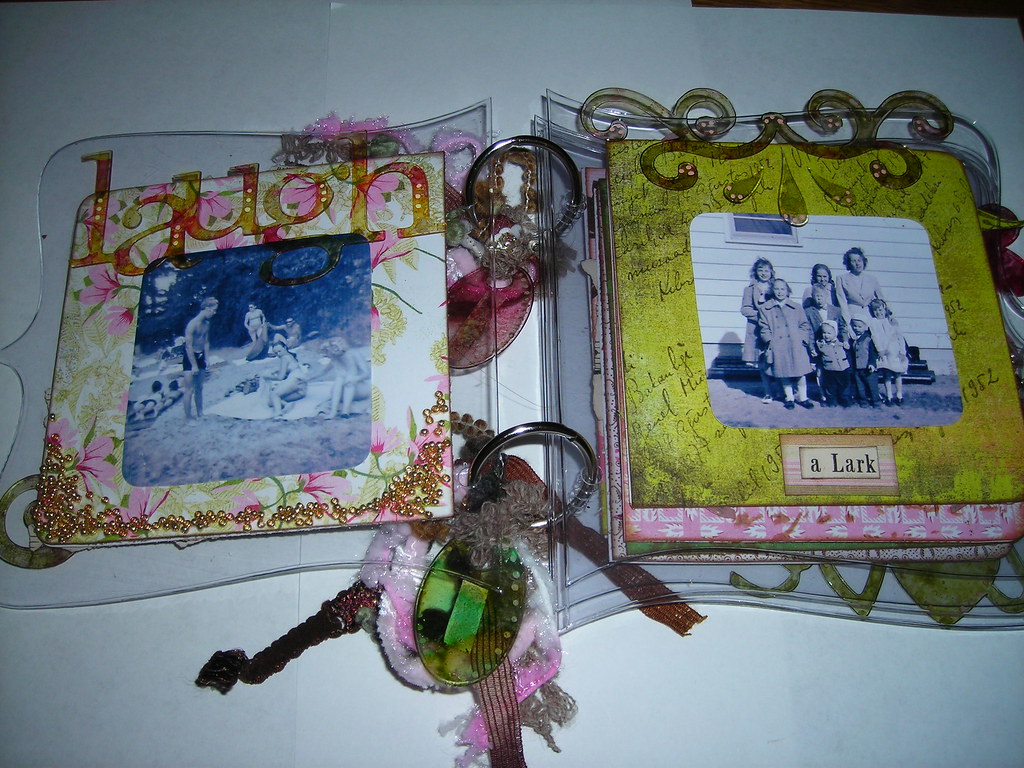
Here is a spread I did with a photo of my grandfather and some vintage sheet music.
Here is another spread that I did. I used some gold beads on the bottom of the first page along with some diamond glaze.
I wanted to give a big thank you to Audrey, who was so kind in helping me out with my glue issue. I probably would've thrown the book through a window, if not for your kind help.
Wednesday, May 07, 2008
ATC Shrine
Here are some photos of this great ATC shrine that I made as part of my design team work for Retro Cafe Art Gallery. The shrine is made out of wood that comes in a big sheet that you punch out and glue together. It can be painted or inked. I used distress crackle paints on mine.
Here is a side view--I actually made the ATC using mounting foam so that the boy looked like he was in a shadow box. But I don't think it shows very well in the pictures. You can, however, see the mounting tape in this picture.
And so that you can see the scale, here is a photo of it hanging on the wall in my studio.
Monday, May 05, 2008
Trees and a Window
As promised here is some new art. The first is a card I made using alcohol inks and a stamp by paperbag studios. I used the ink blending tool to ink the edges of the image in coordinating inks. One of the things that I love about Ranger products is that the colors all coordinated. It makes matching up colors a snap. I'll try to post a how-to for this background as soon as I can.
Here is another little something I made as part of my design team work for Retro Cafe Art Gallery. I used a stamp from Stamper's Antonymous for the image and then added a little bit of paper glaze to give it the glass-like look. I used chalk-inks to color the window--I just heat set them.
Sunday, May 04, 2008
Rant & A Thank You
Today, my friend Kris and I went down to Nashville to do a little shopping and walk around. It was a lovely day. We stopped by Wishful Thinking, which is the store I do some teaching and design team work for to pick up some stuff for a project I'm doing for Marlene (my boss) and then wandered over to another paper/stamping/scrapbooking store in town. Now, let me say up-front that while theses stores both sell art supplies, the gestalt of them is very different. It's like apples and oranges. They are so different, in fact, that they've both managed to stay in business in a very small town. Well the owner of the store kicked my friend and I out because she recognized me as someone who teaches for Wishful Thinking.
I am not kidding.
What confuses me is what did she really think I was going to do?
I'll tell you what I was planning on doing--buying something. (Oh! The Horror!)
I could not believe it.
And what struck me the most about it is how very contrary it is to the philosophy of so many mixed-media artists out there. It got me thinking about how very generous so many of the folks are with their techniques, their time and their posts. Just off the top of my head I can think of 10 artists that regularly post how-to's on their website, who are never to busy to answer questions or emails, and who generously share what they know. I'm not just talking about people who do this for fun, I'm talking about some biggies, like Tim Holtz, Marry-Jo McGraw, and Michelle Ward.
So, I wanted to officially say thank you to all you wonderful folks, big and small, who so generously share your art and yourself with us.
And for the store owner, I have to say, I feel sorry for you. I really do. I can't imagine what it must be like to live in a world where there is only room for you.
OK, here ends my rant.
Tomorrow I will be back with art.
Thursday, May 01, 2008
Wednesday Stamper
The theme for this week's Wednesday Stamper is stripes and since I don't have any stripped stamps, I made this using my handy dandy ink blending tool! The Laughter stamp is by Hero Arts and the clown is a Zettiology stamp. For step-by-step instructions on making the stripes, scroll on down this post!
To do this project you will need glossy cardstock, ink blending tool (or make-up sponges which can be used for stazon/glossy cardstock combination), Stazon inks in various colors and painter's tape.
Take strips of painters tape and mask off the glossy cardstock. Like so:
Using your ink blending tool, ink up and then ink the cardstock. You want to pull it in straight lines and not in circles. Here is what it will look like:
Then, remove the tape and you will be left with little stripes.
You can then re-lay new tape down, covering the stripes and repeat the previous steps with a different color.
Here it is with two colors.
And with three....
If you really want to get wild, you can lay the tape, stamp and then ink. I like to use two different shades of the same color, like light brown and dark brown. Here is what it looks like with the tape still on:
Pull up the tape and viola!
If you have any questions you can always email me, by clicking the link up above.
Subscribe to:
Posts (Atom)