Tuesday, April 29, 2008

Design Team Work

I've been busy doing more design team work for Retro Cafe Art Gallery today. I made these three cards with new collage images. I am just in love with this little girl! This first one I used a acrylic paint on the "adore" stamp. (Sorry, it's clear acrylic, and I don't remember who made it.) The parenthesis are from a punch that I bought a Archivers.
More Punches for the second card. The Happy is actually one big stamp by Hero Arts that I cut apart. The Swirls are by autumn leaves (Recognize these Bev??) and the text is by Stampington.
Can you tell I was in a mood to use my punches?? I made the buttons on the flowers with a little alcohol ink. The swirls are by inkadinkado, and the Italian text is by Hampton Art Stamps.

Sunday, April 27, 2008

A couple more ink blending cars

I made a couple more ink blending tool cards (to see my demo click here). Both of the stamps are by Paperbag studios. The first card I blended chalk ink in three different colors. Instead of leaving the center clear, I worked straight across. I like the look of the chalk inks, but it does lacks the pop of the distress inks.
For this one I used pink distress inks and followed the same pattern I did in the demo, but before I attached the center picture, I spritzed the card with some water to create some spots. If you look closely, you can see them.

Saturday, April 26, 2008

Mini-Shrine

Here are some pictures of another one of my creations for Retro Cafe Art Gallery. It's a mini-shrine, which comes with all the parts cut out of some kind of thick board. Here is a picture with a dime for scale:

For the head, I actually used shrink-plastic in black and stamped onto it with white Stazon ink. When it was cool, I coated it in a clear embossing powder because a lot of the time the image will rub off (even when stamped with Stazon.) The stamp I used is by Lost Coast Designs.
Here is a shot of the back. I don't know why it came out so blurry! But you get the general idea.

Friday, April 25, 2008

Wednesday Stamper

The theme for this week's Wednesday Stamper is insects. So I pulled out my dragonfly stamp by Stamper's Anonymous and made this:

I used the ink blending technique I talked about the other day, except I worked the ink all the way across. When it was dry I spritzed it with some ink mixed with water and pearl ex powder to give it a little sparkle. Of course, it didn't show up very well in the scan, since my scanner doesn't like metallic things. But you can see the green spots.


Thursday, April 24, 2008

Mini-House Book

I have been busy this last week getting some design team work done for Retro Cafe Art Gallery. I've been working with a new line of products that Kris has started carrying by Coffee Break Designs--and I am just loving it! So much of the stuff that she gave me is small sized and I have to say it's been a lot of fun working on stuff that's so tiny. Here are some pictures of a mini-house book I just finished:


The bulk of the bird stamps I used were by Hero Arts and the text all came from various vintage books. I have to say, about half-way through this project I thought I'd lost my mind, sitting in my studio reading through old books looking for just the right words to cut out. But, it was worth it!

Monday, April 21, 2008

Tagged

Kris from Retro Cafe Art Gallery tagged me the other day; so I have to list 6 weird things about myself and then tag three more people. So here goes:
1. I am an insanely fast reader. I can get through around 150 pages an hour if it's fiction.
2. I have never had my hair cut above my shoulders. It's not a religious thing, just a preference thing.
3. I am a huge sci-fi fanatic. I read books, watch movies, tv etc. My current obsession is Stargate Atlantis.
4. I like to tell people that I'm saving myself for Brock Samson.
5. I have a really sensitive sense of smell and can tell when my husband is getting sick by the way his skin smells. In fact, I normally know before he does. The last time he had the flu for 2 days I kept saying to him "You smell like you're getting sick" and he denied it and then on day three: 101 degree fever.6. I don't eat cooked vegetables, except for potatoes. I like 'em raw.

So, I'm tagging Diana, Gina and Dorene. All of whom are in IAA with me. So get posting ladies!

Sunday, April 20, 2008

Ink Blending Tool How-To

Here is my promised ink blending tutorial.
I have to say that when Inkessentails came out with the blending tool, my response was a not so enthusiastic "eh." I had ink "daubers" and didn't really see the point of buying yet another one. But then, I saw a sample of work that had been done with it and I went from "eh" to "oh my!" It's now become one of my favorite tools.
Here's the supply list for this project: three colors of ink, one of which should be light, one dark and one brown or black (I am using distress inks: tea dye, pine needles and walnut stain) ink blending tool and three blending foams (these are re-usable and last a really long time so don't start stressing about the cost of buying a ton of these little foams), something to protect your work surface, your inking surface and stamps.

Start with your lightest color and ink up your foam using a pouncing motion (the foam should be on the applicator, I know that sounds like a silly reminder, but I've actually forgotten to put it on a couple of times.)

Starting off of the paper, drag the blending in small circles onto the paper. You want to use a light touch and then press harder as needed. Remember, it's easy to add color, impossible to subtract!

Do this all around the edges of the card leaving the middle circle empty. This provides a nice visual focal point and gives it a little pop.

Now, using the same off the paper technique do the same with the darker color (remember to change your foam before you start!) You only want to come in a little, leaving the lighter color still showing.

Now take your dark brown or black and ink-up a new foam. Instead of working in circles this time, place the blender just on the edge of the paper and pull back off onto your craft mat/work surface protector. You can also pick the paper up and swipe the edge with the color.

Now, you're ready to add some stamps. I like to do a couple of stamps around the outside leaving the inside blank for the focal stamp.

Then, I stamp on a separate piece of paper and using the lightest color ink it as in step one, and then using the brown/black ink the edges. This echos what's going on the card and helps the image to feel like it belongs. You can always skip this and just stamp right into the center, but I like the look of the third image on top.

Then attach to your card and you're all finished!

The stamps I used here were by paper bag studios (the girls and the script) and inkadinkado for the swirls.
If you have any questions about the technique, or if one of my steps wasn't clear, please feel free to email me.

Friday, April 18, 2008

Men ATCs

I know, I've been gone a long time.
Sigh.
I've been having some health issues and in between being poked and prodded by various doctors and battling my insurance company (who seem to feel that being human is a pre-existing condition)I just haven't had much energy to do much posting.
But I did manage to get my ATCs done for the swap on Saturday. The theme this month is Men; mostly because we did women last month.
Here are my cards:

I used this really wonderful technique and the Ranger ink blender tool to make the backgrounds. (For which I will post a tutorial some time this week, scouts honor.) The orange and blue background stamps are both by Paperbag Studios, the green is by Inkadinkado, and the purple is by Rhonna Ferrar. I used some alcohol inks on the buttons to get that lovely aged look.
All in all, I'm happy with the way they turned out.

Thursday, March 27, 2008

Journal Pages

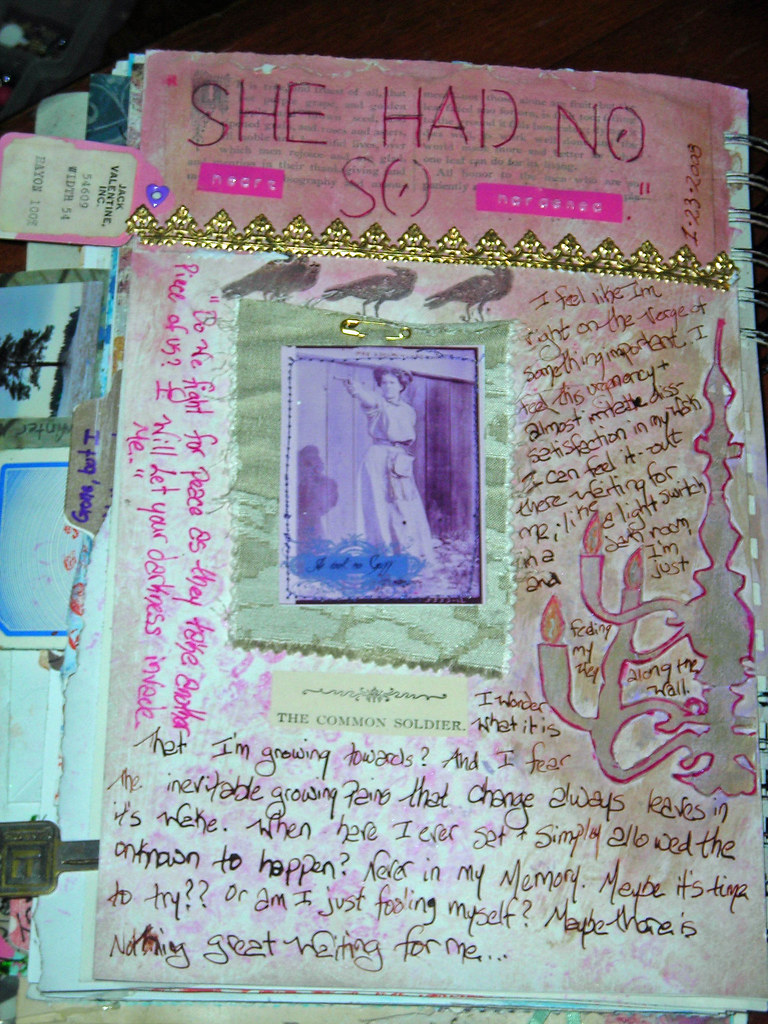
Here are a couple of older journal pages that I never got around to posting. I have started journaling again--the winter doldrums have finally left me and I feel ready to get back to it. I even made myself a new journal, since I finished my old one. Here are my pages:


Wednesday, March 26, 2008

ETSY

I have finally done it--I've opened an ETSY store. I don't have very much in it right now...I have a couple more pieces that are about half finished, that should be going up sometime soon. It was a lot more work than I thought it would be....mostly figuring out what to charge for shipping and all that. Here are a couple of pictures of pieces I have up for sale. One of them is the piece I showed at the end of my last post all finished in necklace form. The other is a canceled British postage stamp. It was actually difficult for me to list that one, because I wanted to keep it for myself! I am just in love with the heart cancellation mark over her crown.

I have some new journal pages done, I will try to get them posted tommrow. In the meantime, happy Wednesday everyone.

Sunday, March 23, 2008

how to colorize UTEE

I know, I've been totally absent the last week. I am a bad, bad blogger. Sigh. But, in my excuse, I've had more work than I know what to do with. It seems like my list keeps getting longer and my days keep getting shorter. So to make-up for my absence, here is a little how-to for you:
HOW TO COLORIZE UTEE
It is no secret that I love UTEE. It has so many wonderful uses--and one of the best things about it is that it can be colorized. Here is what you will need, plain UTEE, alcohol inks, mixing container, Popsicle stick, and pearl-ex (optional.)


I like to use a watchmakers tin for mixing because it has a nice wide mouth and makes stirring easier. Put some UTEE in the tin. I like to use about 2 tablespoons, but you can do as much or as little as you like.
Next put 3 drops of alcohol inks in your UTEE. It will clump and ball up, this is where your pop sickle stick comes in--use it to mash and stir the UTEE dispersing the color.

You know it's ready when the UTEE is dry and stirs easily with no clumps. If you can't get it to this stage add a little more UTEE to help dry it out and keep working. You can, of course play around with color combinations--but I've gotten my best results with mixing the colors into the UTEE in separate batches and then stirring the powder together (for example mixing one batch of red and one of yellow and then combining the powders to make a nice orange) because sometimes mixing them directly makes the color get muddy.

Now, for the last step I like to add a little pear-ex to the mix. It gives the powder a nice shimmer. (Actually, what I do, is take half the powder and put it one container without the powder and mix the pearl-ex into the other half so I have both.) All you really need is one little scoop--a little but of this stuff goes a long way.
Here is a picture of a piece I did using colorized UTEE both with and without the pearl ex powder:

You should note that the colors will always be opaque, unless you mix in some white UTEE. There is just no way around it.

Hope everyone has a great weekend!

Tuesday, March 18, 2008

Some Work

I haven't gotten a lot done in the past few days--mostly because I started sleeping again and that really cuts into my productivity. There really aren't enough hours in the day.
But I have been working on some necklaces. They're mostly mock-ups for designs I'm, considering. I am hoping to have some stuff up in my Etsy store in the next month or so...but it seems like there are a lot of ducks to get into a row for that to happen.
In the meantime, here are a few of my pieces:


Friday, March 14, 2008

Returning to your roots

This week has been very stressful for me. We've had car issues (mechanics, need I say more?) and health insurance issues (trying in to reduce their costs by killing me with paperwork) and I haven't been sleeping...I hit this place yesterday where I thought I could feel my brain trying to explode out of my head. And then to top it off the IAA is meeting on Saturday and we have a record 12 people coming! that's 11 ATCs that I had to get done. Normally, art is a solace for me, but when I sat down at my studio table all I wanted to do was cry at the thought of having to make so many cards.
But then, something wonderful happened; I pulled out my trusty copic markers (have you seen them? They're amazing! Alcohol based, so no nasty cancer causing chemicals, completely refillable with replaceable nibs, so environmentally friendly and beautiful transparent colors) and I started to color. All of a sudden, I remembered when I was little, how much I loved to color. First with crayons and then later, with colored pencils. It was a form of meditation for me, putting color to the world and settling everything inside. And as I sat at my table coloring in my ATCs for this Saturday, I found that same safe place inside of me. Everything relaxed, everything stilled and the world, for once, did not seem such a chaotic place. Instead it was awash in transparent colors reflecting a serenity I'd all but forgotten.
You should try returning to your roots--find that first thing about art that you loved and do it again. See if it doesn't still fill you with wonder.
Here are a sampling of my cards--I couldn't fit them all in one scan since there were so many of them. The name of the stamp I used here is "Anxious Annie," I thought it was fitting. You really have to click on the picture to get a real idea of what the colors look like. Since the cards are so small here, you can't see the detail.


Hope everyone has a wonderful weekend.

Thursday, March 13, 2008

Ft. Harrison Classes

Hi Everyone:
I got the final information about the class retreat in April that I will be teaching at. The complete information is below along with photos for each of the classes. Space in the class has been limited (in some cases as few as 10 or as much as 15 depending on the nature of the projects) so if you want to go signing up sooner rather than later is a good idea. Carol is the other artist teaching and she is REALLY amazing. I think it's going to be a really fun day.

Wishful Thinking Guest Artists Hit the Road! Saturday, April 12, in Indianapolis! We are thrilled to announce that we will be teaching a total of SIX rubber stamp classes in Indianapolis! Classes will be held at the Ft. Harrison Veteran's Center, 9450 E. 59th Street (on the NW corner of 59th St & Lee Rd), Indianapolis, IN (on the northeast side of Indianapolis).

We have TWO artists scheduled for a full day of classes! Because we anticipate these classes to fill up quickly, we highly recommend you call us (812-988-7009) or email us (wishful@wishfulthinking-in.com) today if you want to participate in any of these classes. Please note, two classes will be going on at the same time.


Sign up for 2 of these April 12 classes before 4/1/08 & save $5!
Sign up for 3 of these April 12 classes before 4/1/08 & save $10!


Sat, Apr 12
8:30-11:00 AM


Class to be held at Ft. Harrison Veteran's Center, 9450 E. 59th, INDIANAPOLIS, IN
Creative Collage Paper
Guest Artist: Carol Ponsford
Join Carol in creating some wonderfully vivid papers to use in collage, card making and ATC creations. Starting with Bristol board, we will layer color upon color giving these unique papers great dimension. Using the fabulous Adirondack dimensional paints, you will be amazed at the effects you can achieve when combined with dye and chalk inks, stamps and acrylic paints. Once we create several papers, you will see how easy it is to incorporate them into cards, bookmarks or ATCs. Please bring your toolbox, as well as a juicy dye based rainbow pad and your desire to experiment with color.
Cost: $25.00

Sign up for 2 of these classes before 4/1/08 & save $5!
Sign up for 3 of these classes before 4/1/08 & save $10!
Sat, Apr 12
8:30-11:00 AM


Class to be held at Ft. Harrison Veteran's Center, 9450 E. 59th, INDIANAPOLIS, IN
Vintage Ruler Book
Guest Artist: Bianca Mandity
Come and explore the wonderful line of distress products by Ranger--including the amazing new Grunge Board--while creating a mini-ruler book. Learn how to transform your modern supplies by painting, spritzing, inking, crumpling, stamping, hammering and sanding your way to an authentic vintage look. We will explore seven new distress techniques, used by Tim Holtz himself, to get that fabulous vintage feel! Participants are invited to bring a 2x3 copy of a black and white photo to distress and colorize as part of the process. Please bring your toolbox.
Cost: $28.00 (includes blank ruler book, valued at $5.99)


Sign up for 2 of these classes before 4/1/08 & save $5!
Sign up for 3 of these classes before 4/1/08 & save $10!
Sat, Apr 12
12:15-2:45 PM

Class to be held at Ft. Harrison Veteran's Center, 9450 E. 59th, INDIANAPOLIS, IN
With One Stamp
Guest Artist: Carol Ponsford
Create 3-4 cards using an assortment of mediums (Staz-on, Distress Inks, Cat's Eye, Adirondack Inks, etc) with the 6-sided Shore cliff cube stamp from Stampington & Co. Several techniques will be taught that can add flair to your card-making experience. The class fee includes the 6-sided cube stamp, so you can take the stamp home to continue the fun! Please bring your toolbox, plus a craft sheet and black Sharpie ultra fine point permanent marker.
Cost: $37.00 (includes the price of one stamp, valued at $16.99)


Sign up for 2 of these classes before 4/1/08 & save $5!
Sign up for 3 of these classes before 4/1/08 & save $10!
Sat, Apr 12
12:15-2:45 PM

Class to be held at Ft. Harrison Veteran's Center, 9450 E. 59th, INDIANAPOLIS, IN
Playing Card Book
Guest Artist: Bianca Mandity
Are you curious about alcohol inks? Come and learn all about these fast-drying, acid free, transparent inks. We will explore their many uses and learn how to use them to transform common crafting supplies, all while creating an accordion style, playing card book! Participants are invited to bring copies of 2x3 photos to incorporate into their books. Please bring your toolbox.
Cost: $25.00


Sign up for 2 of these classes before 4/1/08 & save $5!
Sign up for 3 of these classes before 4/1/08 & save $10!
Sat, Apr 12
3:15-5:45 PM

Class to be held at Ft. Harrison Veteran's Center, 9450 E. 59th, INDIANAPOLIS, IN
Simply StazOn
Guest Artist: Carol Ponsford
If you enjoy working with brilliant color, you will be delighted with the results you can achieve using StazOn ink. Each participant will make at least 4 cards and learn some helpful hints on using these vibrant ink pads. Please bring your toolbox, embossing or Versa Watermark ink pad, Archival Black ink pad and any StazOn ink pads you may have.
Cost: $25.00


Sign up for 2 of these classes before 4/1/08 & save $5!
Sign up for 3 of these classes before 4/1/08 & save $10!
Sat, Apr 12
3:15-5:45 PM

Class to be held at Ft. Harrison Veteran's Center, 9450 E. 59th, INDIANAPOLIS, IN
Faux Fantastic with Perfect Pearls
Guest Artist: Bianca Mandity
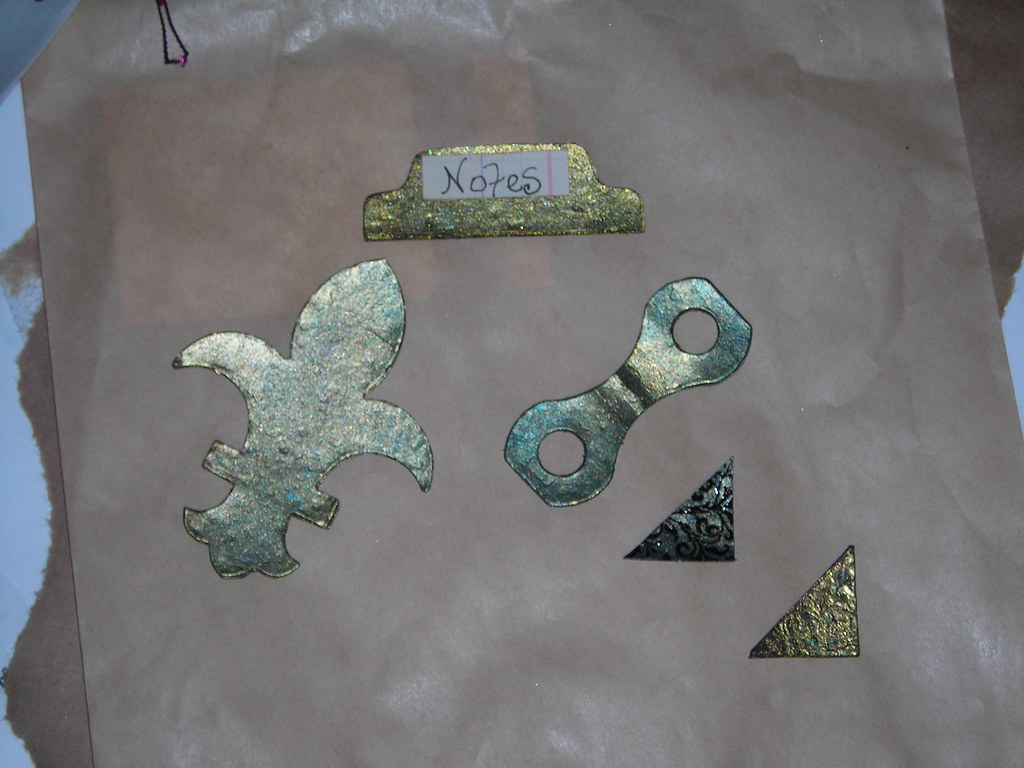
Perfect Pearls are one of the most versatile products on the market! Come explore some advanced techniques and learn how to use them to create all kinds of Faux Fantastics! We will be creating a Faux beach glass pendant using recycled CD plastic, Faux metal accessories (like book corners, tabs and hinges) using nothing more than card stock, faux mosaic tiles with UTEE and faux embossed metal that is perfect for cards or even home decoration! Please bring your toolbox, heat gun, scissors, glue, pencil, craft sheet, water sprayer and tweezers. Class Level: Intermediate
Cost: $28.00


Sign up for 2 of these classes before 4/1/08 & save $5!
Sign up for 3 of these classes before 4/1/08 & save $10!

Sunday, March 09, 2008

Faux Fantastic Part Duex

Here are my other two samples for the Faux Fantastic class I'll be teaching in April over at Ft. Harrison. Tomorrow, I hope to post the full teaching schedule along with the prices. It looks like it's going to be a really fun day. The other two techniques I'll be teaching is faux metal parts (like hinges, book corners etc.) and faux embossed metal, like tin or copper. Everything is made using paper. No chipboard or grunge board--just plain old cardstock!
Here are my images:

Wednesday, March 05, 2008

Faux Fantastic

I taught at the Heirloom festival this weekend--and had an absolute blast! I bought some great new supplies and got to hang out with some amazing other artists.
And then, I came home and promptly got sick. Sore throat, fever, achy, ugh. But I am feeling better today. I spent some time in my studio today creating some samples for a class I'll be teaching at a retreat in April called Faux Fantastic with Perfect Pearls. The samples I got done today were a faux mosaic and a faux beach glass pendant. Here they are:


I am hoping to have the full information for the glass soon--and once I do I'll post it here. In the meantime, I'm going back to my studio to play with my new stuff!